Do you want to add Accept Apple Pay support to your WordPress site?
Apple Pay has increased in popularity over the last several years, and there are now various simple methods to accept Apple Pay as a payment option on your website.
We’ll teach you how to accept Apple Pay in WordPress in this article.
Why Accept Apple Pay in WordPress?
If you’re selling items or services on your WordPress site, it’s critical that you provide your customers the option of paying using their preferred method.
Using a credit card is common, although other methods such as Apple Pay and Google Pay are gaining popularity. Apple Pay currently owns over 40% of the mobile payment industry in the United States, and it simplifies online payments.
Online Apple Pay payments, on the other hand, can only be done using the Safari browser on a Mac or an iOS device.
Let’s take a look at how to accept Apple Pay in your online business, shall we?
Note: We’ll show you how to add an Apple Pay option to your WordPress site without having to install a full eCommerce cart, but we’ll leave additional resources for you to check out.
How to Accept Apple Pay in WordPress
Installing and activating the WP Simple Pay plugin is the first step. See our step-by-step guide on installing a WordPress plugin for more information.
Because it’s both easy and powerful, WP Simple Pay is one of the most popular WordPress invoicing and payment plugins among small business owners. The greatest thing is that there are no additional transaction costs with WP Simple Pay, and you can put it up without the hassle of a cart system.
While the plugin has a free version, you’ll need the Pro version to take Apple Pay, generate on-site payment forms, and other features.
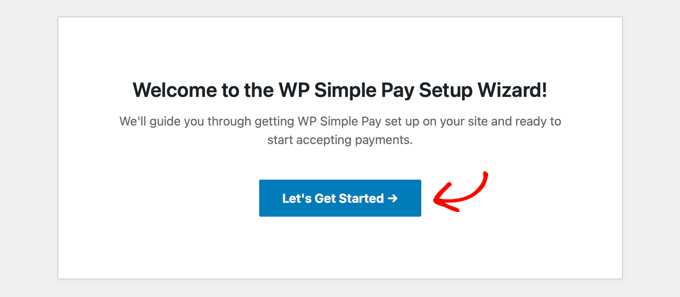
The WP Simple Pay setup process will launch automatically after activation. Simply click the ‘Let’s Get Started’ button.
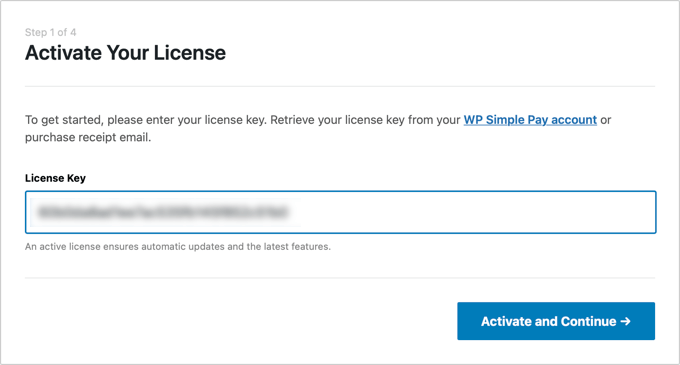
First, you’ll be asked to enter your license key. You can find this information from your account on the WP Simple Pay website.
After that, you need to click the ‘Activate and Continue’ button to move to the next step.
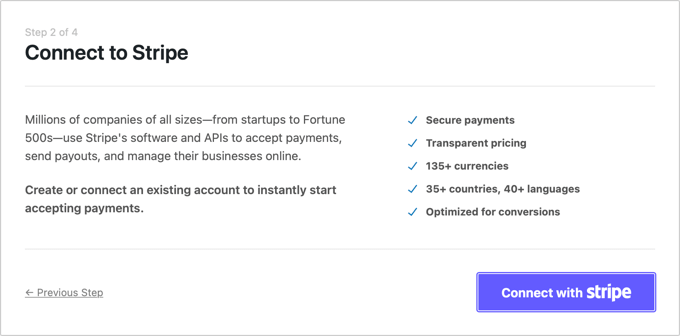
Now you’ll need to connect WP Simple Pay to Stripe. Stripe is a popular payment gateway, and it’s the easiest way to add Apple Pay to your WordPress site. It also supports all top credit and debit cards, Google Pay, and more.
Simply click the ‘Connect with Stripe’ button, and from there you can log in to your Stripe account or create a new one. Anyone with a legitimate business can create a Stripe account and accept payments online.
Once you’ve connected to Stripe, you’ll be asked to configure your WP Simple Pay emails.
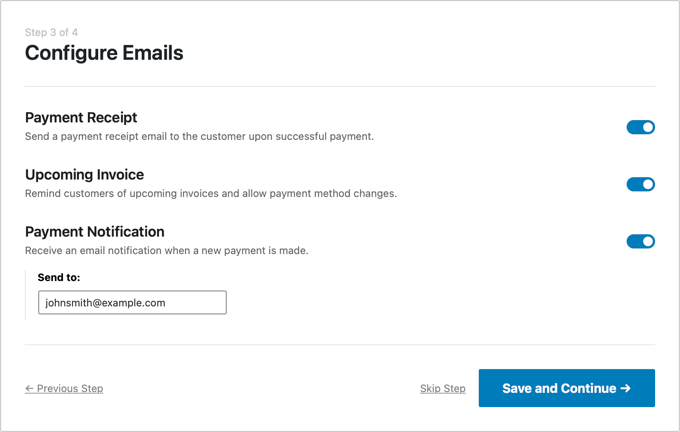
The options for payment and invoice emails to your customers have already been enabled for you. So is the option for sending payment notification emails.
You just need to enter the email address where the notifications should be sent.
Once you’ve done that, you need to click the ‘Save and Continue’ button. This completes your setup of WP Simple Pay.
Creating a Payment Form in WordPress
Next, you need to create a payment form.
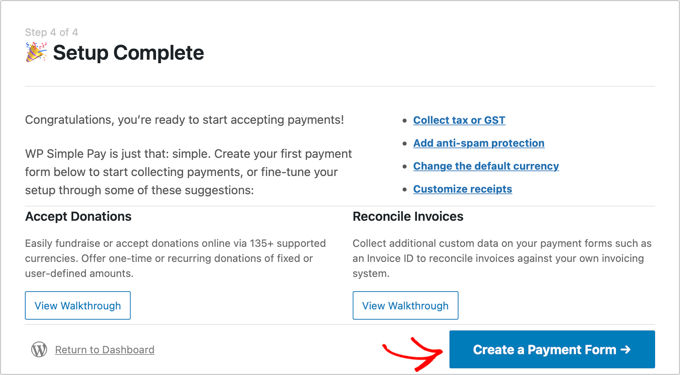
You can get started by clicking the ‘Create a Payment Form’ button on the last page of the setup wizard. This will automatically take you to the WP Simple Pay » Add New page.
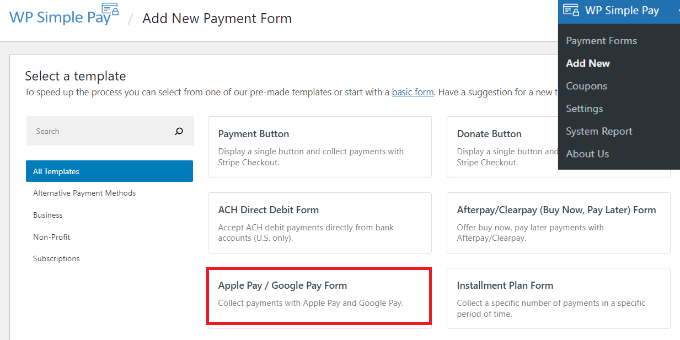
WP Simple pay offers different templates for payment forms. Go ahead and select the ‘Apple Pay / Google Pay Form’ template.
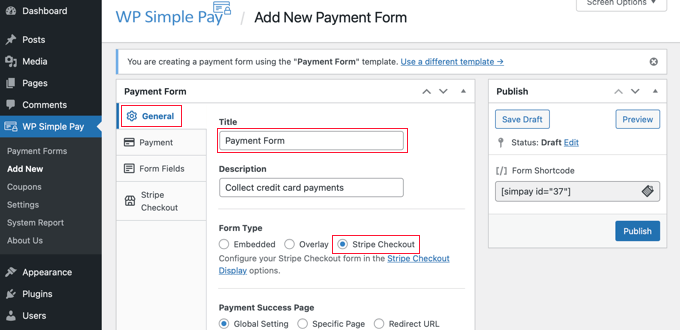
You should start by giving the payment form a name and description.
After that, you can select any form type (Embedded, Overlay, or Stripe Checkout). For this example, let’s select the ‘Stripe Checkout’ option under Form Type.
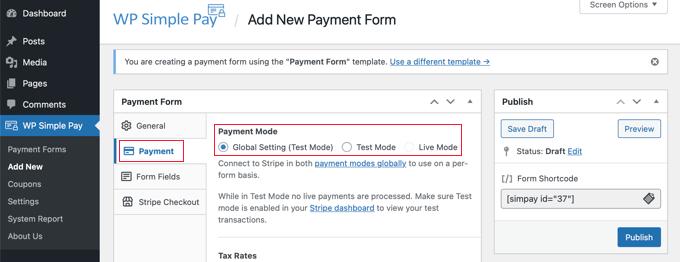
The next step is to select the Payment tab. You may choose between live and testing payment modes here.
Testing mode allows you to make payments that aren’t charged to Apple Pay so you can double-check that your form is operating and that emails are being delivered.
When you’ve done testing and are ready to start collecting payments from your clients, be sure to update this to ‘Live.’
You can also add the products or services that you offer, along with their prices and whether they are a one-time payment or a subscription.
An example price option should be already created for you. You can edit this price and simply click the ‘Add Price’ button until you have added as many prices as you need
Then for each one, you will need to add a label and price. You can also select other options, such as if the price is a subscription, or the user can determine the price, as in a donation.
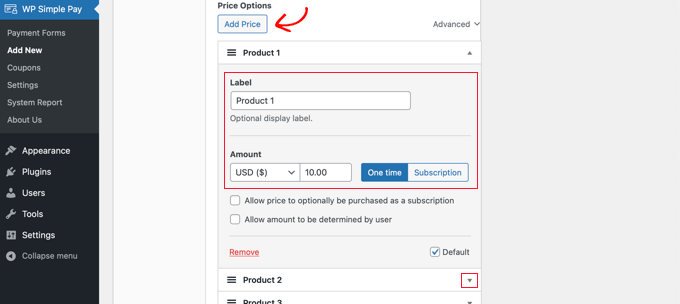
You can show or hide a price by clicking the small arrow on the right.
Next, we’ll move on to the ‘Form Fields’ tab. The essential fields have already been added to the form, and you can add more if necessary.
Using the ‘Form Fields’ drop down, you can choose additional fields and add them by clicking the ‘Add Field’ button. Options include name, phone number, address, and much more.
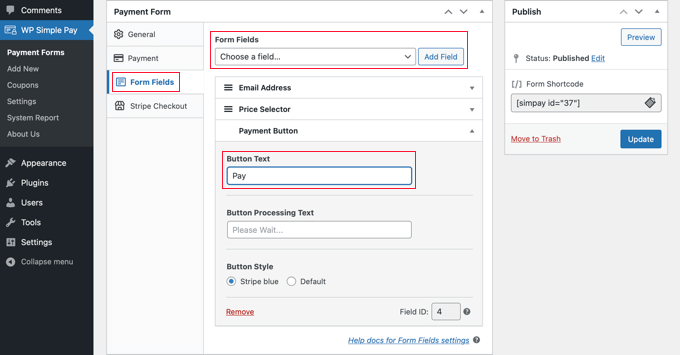
The default text on the button is ‘Pay with Card’. If you like, you can change the text to something more generic, such as simply ‘Pay Now’. Then your customers won’t assume that credit cards are the only payment option.
Finally, the ‘Stripe Checkout’ tab allows you to select additional payment methods and tweak the checkout form that is displayed after the user clicks the ‘Pay’ button.
For this tutorial, we’ll leave those settings as they are.
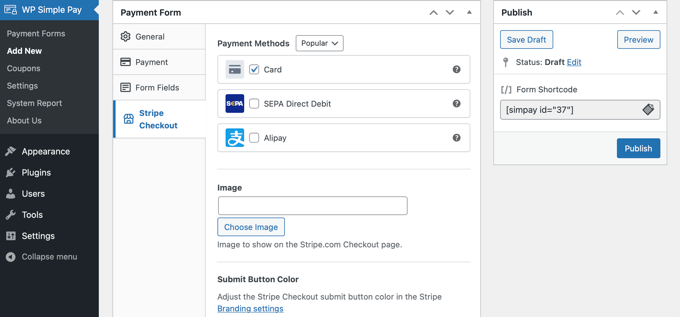
When you are happy with your payment form, click on the ‘Publish’ button to store your settings and push the form live.
Now we can add the form to a post or page on your website.
Adding the Payment Form to Your Website
WP Simple Pay makes it super easy to add forms anywhere on your website.
Simply create a new post or page, or edit an existing one. Then, click on the plus (+) sign at the top and add a WP Simple Pay block in the WordPress block editor.
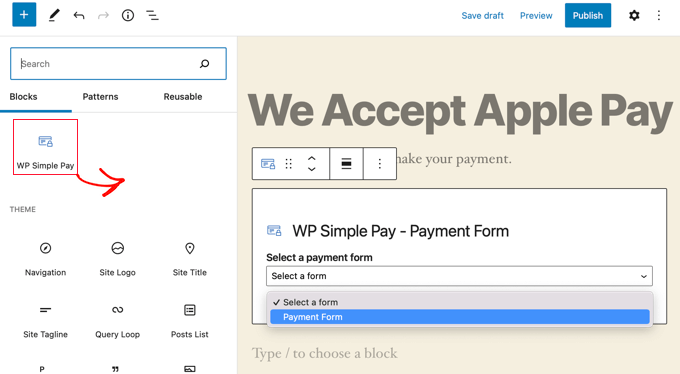
After that, select your order form from the dropdown menu in the WP Simple Pay block.
Once you’re finished, you can update or publish the post or page, and then click on the preview button to see your form in action.
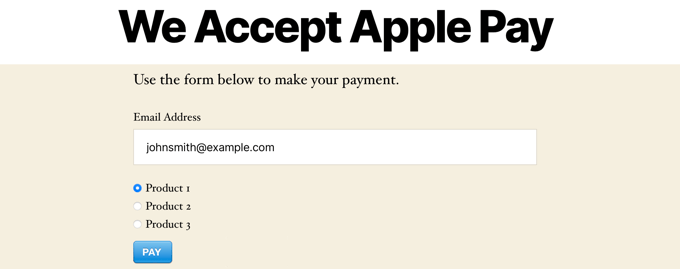
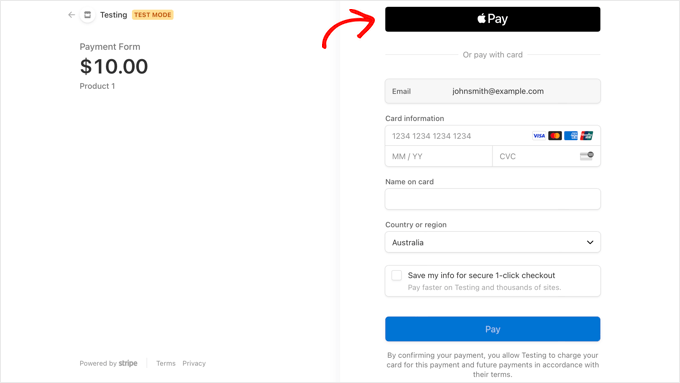
When your users click the Pay button, the Stripe checkout form will be displayed.
If they are using the Safari browser on a Mac or an iOS device like iPhone, then the Apple Pay option will be displayed at the top of the form. Otherwise, the Apple Pay option will be hidden, and your customers can pay using a credit card.
If you want to integrate Apple Pay to your WordPress site in a different method, you may utilise comprehensive eCommerce solutions like Easy Digital Downloads or WooCommerce. Apple Pay and Google Pay are supported by both of them.
We hope you found our article on how to accept Apple Pay in WordPress useful. You might also want to look at our list of the best live chat software for small businesses or learn how to make a contact form in WordPress.


